For beginners, you can shoot silhouettes, use a tripod, and capture moving objects. These are just some of the many ways you can improve your photos. There are so many ways to improve your photographs. Continue reading to learn more. Do not forget to share your creations!
Shooting silhouettes
Silhouettes can be used to capture beautiful shapes in images. These photographs can be romantic and depict love scenes, dancing figures, or anything you can think of. Proper lighting is necessary to create a beautiful silhouette photo. There are many tips for shooting a silhouette image. Start by choosing a neutral backdrop.
Begin by framing the scene together with your subject. You should ensure that the background isn't too blurry. Keep in mind to use low ISO settings and fast shutter speeds. You can also download apps that can help you create a silhouette from your photo.
Getting starburst effect
The first step to creating a starburst effect with your camera is setting the right settings. You can use either a large aperture (or a small one) depending on the model of your camera. Mirrorless and DSLR cameras typically allow you control your aperture. Mobile phones may not allow wide apertures.
Starburst effects can be achieved best by using a single point light that is far enough away. You could use the sun, a lamp, or the headlights on cars and other vehicles to create the starburst effect. If you are using a bulb to light up, make sure the aperture is set to the highest setting, but keep out of direct sunlight.
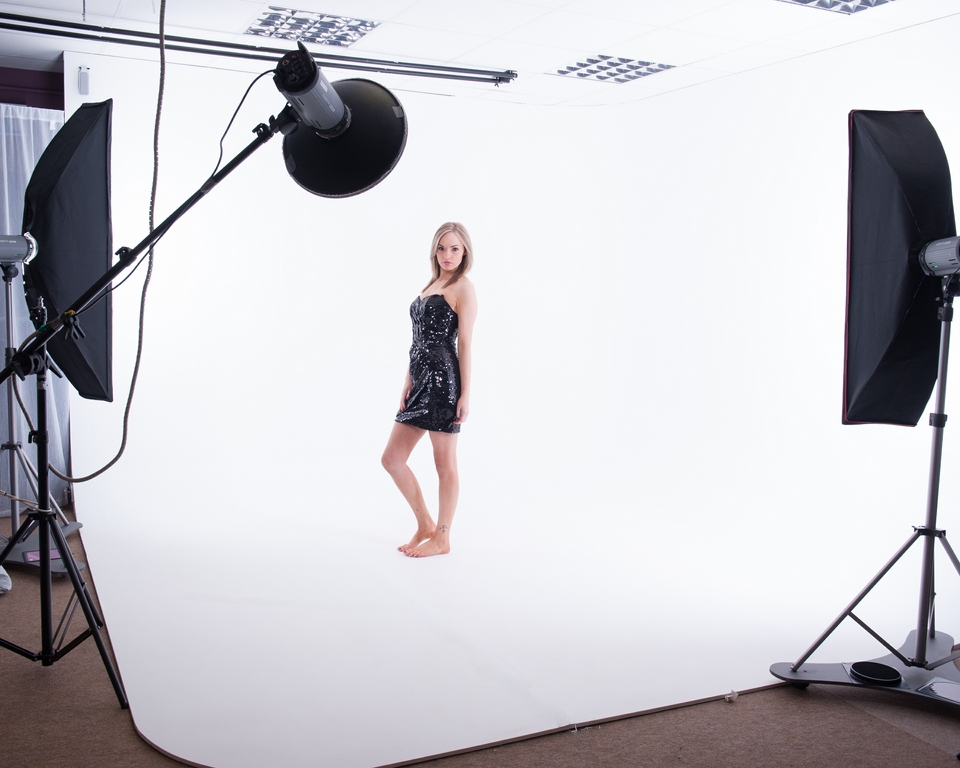
A tripod is recommended
A tripod is essential when taking photos. Tripods offer stability that is greater than a camera mounted on one leg. They are particularly useful for 360-degree panoramas. A tripod can help you avoid reflections in mirrors. A tripod will allow you to compose your photographs in a more thoughtful way.
Before using a tripod, ensure you have enough counterbalance. The counterbalance is usually measured in pounds but can also be measured in kilograms. Counterbalance derives its name from sailing, when sailors used counterweights as a way to balance their ships. This is similar to a tripod, which needs to have enough weight on one side to keep it upright.
Photography of moving objects
Taking pictures of moving objects requires a different approach than photographing stationary subjects. Your subject must be sharp and well-focused. You need to pay particular attention to lighting and composition. It can be challenging at first but you will soon get used to it.
It is essential to set the shutter speed for your camera in order to achieve this effect. The shutter speed can be changed to freeze action or capture motion blur. If you are photographing a car for example, you could use a shutter speed up to 1/500th of an second. This speed will keep your subject sharp even though it is moving, and will help you avoid getting blurred shots.
Take pictures of abandoned buildings
A unique photo opportunity is offered by abandoned buildings. The lighting can be dim so it is important that you have a flashlight with which to navigate. Having a flash on hand will also help you focus. Manually setting your camera's ISO at 800 or higher will be necessary. A tripod will also help keep the lighting even and pick up textures. If you shoot handheld, consider using an image stabilization camera.
An abandoned building can be difficult to photograph, but there are some places that still have vibrant, colorful areas. Be aware of perspective distortion, especially in buildings with straight walls and pillars. To prevent this, you may want to consider using a tilt-shift lens or an ultra wide lens. Additionally, a person can help you show the height of the ceiling.
Photographing toys
Toys can make for great pictures if you know how to create dynamic effects. Attach the toy to a ruler and move it with the shutter open to capture its movement. You can also add dynamic to the photos by adding smoke or dirt effects. Adding humor can also be an effective way to keep viewers' attention.
Toy photography, like all genres, requires practice. You need to practice until you find your rhythm. To find your best settings, experiment with various gears and settings. Start small and don't upgrade too quickly. You should choose a camera that suits your needs and is within your budget. It is a good idea to network with other photographers.
FAQ
Why use Light Room to enhance your pictures?
Start early to get the best photos possible for your project. It's better if you take as many shots possible before you decide on the ones that give the most value.
This is possible because Lightroom lets you see how different settings affect each image. These settings can also be modified on-the-fly in Lightroom without ever having to open Photoshop again. This allows you to quickly test what looks great and what does not.
What Camera Should I Get?
That all depends on what kind of photographer you want to become. A basic point and shoot camera is enough if you are just starting.
However, once you've mastered the basics, you'll likely want something more advanced. The decision is yours.
Here are some things to consider before purchasing a camera.
-
Features: What features do you need? Do you intend to use manual or autofocus settings? What number of megapixels does the camera have? Is there a viewfinder on your camera?
-
Price: How much do you want to spend? Do you plan to update your camera every other year?
-
Brand: Are you happy with the brand that you choose? You shouldn't settle for less.
-
Functionality: Can you use your camera in low light situations? Are you able to take high-resolution images?
-
Image Quality: How clear are your images and how sharp are they?
-
Battery Life: How long will your camera last between charges?
-
Accessories: Do you have the ability to attach flashes, additional lenses, and so forth? ?
Is digital photography hard?
Digital Photography is not as easy as you think. You will need to spend time learning how to use these tools correctly. To be able to take different types of shots, you must know what settings are appropriate. You can learn best by doing. Practice makes perfect.
Statistics
- By March 2014, about 3 million were purchased monthly, about 30 percent of the peak sales total. (en.wikipedia.org)
- The second easiest way to get blurry photos 100% of the time is to use a cheap filter on the front of your lens. (photographylife.com)
- In this case, 100% of readers who voted found the article helpful, earning it our reader-approved status. (wikihow.com)
- This article received 13 testimonials, and 100% of readers who voted found it helpful, earning it our reader-approved status. (wikihow.com)
External Links
How To
How to take macro shots in photography
Macro Photography refers to the ability take pictures of small objects like insects and flowers at close range. Macro comes from the Greek makros (makros) which means large. If your lens has a focal distance greater than 50mm you can photograph objects that are extremely close up.
A macro lens that is good should have a long working range and a fast aperture to get sharp images. It is important to avoid motion while taking photos. Anything that moves during exposure may blur your image.
Here are some great tips to create stunning macro photographs.
-
Use a tripod. Use a tripod. This will ensure that you have less movement while shooting.
-
Select the right lighting. You can get a macro lens with built-in lights filters. However, if you don’t have one, you can purchase one. This helps prevent overexposure.
-
Be patient! Shooting macros takes practice. Sometimes you might only be able see a very small insect or flower. However, it's worthwhile to keep shooting until it appears.
-
RAW file format allows you to shoot in it. RAW files store more data than standard JPEGs. RAW files can be edited later and allow for more detail such as cropping and color correction.
-
It's important to remember the background. The background can be as important as the foreground. Make sure to include it in the photo.
-
Keep learning.